Cathy’s Pickled Jalapeño Peppers
Fall is here and the summer gardens are winding down. The peppers are still abundant, the bushes are full of peppers and will keep producing until they freeze. Finally here is the recipe for my pickled . I have been making these for over a decade and we love them! Sometimes they are hot and sometimes they are not. We really love to eat them on the side with pizza or BBQ sandwiches (my husband puts a jalapeno half on his cheese flavored tortilla chips and swears they’re great – I take his word for it!). I can as many jars as possible. Canning is a simple process if you have not canned before go to Ball Canning for some great information: www.freshpreserving.com. Don’t be intimidated, this is an easy recipe to start with.
Cathy’s Pickled Jalapeño Peppers
Jalapeño Peppers
Whole garlic cloves, peeled
Carrots (optional)
2 cups white vinegar
2 cups distilled water
¼ cup sugar
1 Tablespoon Kosher salt
Makes 4 pint jars. Easily can be doubled or tripled.
Step by Step directions:
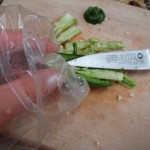
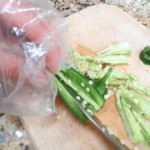
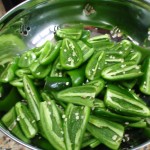
Preparing jalapeños; wearing plastic gloves or in my case I ran out and used a sandwich baggie. Hey, whatever works! Cut off stem end, slice jalapeño in half and with a knife remove the seeds and vein. If it’s a nice day I will do this outside at the table and let the seeds fall where they may. Another word of advice, if wearing shorts while doing this, seeds will fall in your lap and later you may wonder why your legs are burning in spots! Toss halves into a colander and then rinse and hold your breath!! The water releases all the heat into the air and it may make your eyes water and it will make you cough. That’s why this step is important, do not cut and devein your peppers under running water or you will be miserable. Do not introduce water until all the knife work on the pepper is done. If your peppers are really dirty, rinse and then let dry before you start cutting. Seriously this is a great tip.
The bare essentials for canning; the canning tongs are a must have! Trying to use regular tongs, even if you put rubber bands on the ends (yes I did this before I knew such canning tongs existed) and the jars will slip out of your grip. So go ahead and buy the canning tongs, they are inexpensive, a funnel and, of course, your jars, lids and rings. A big stockpot and I also use distilled water for consistency. The water out of your tap is too unpredictable. If you have a water softener, your pickles will be soft and mushy. Hard water can lead to problems too. Food for thought, or thought for food!
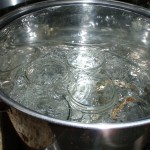
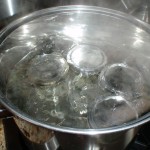
Prepare your jars; clean your pint jars. Bring a large pot of water to a boil, submerge jars into water and boil for 10 minutes. The water should be 2 inches above the jars. Also, put the rings in at this time. This process sterilizes the jars. After 10 minutes remove jars and rings, draining the water from them back into the pot; set on a clean kitchen towel.
In a medium saucepan combine vinegar, water, sugar and salt and bring to a boil. This will fill 4 pint jars. Double if needed.
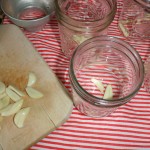
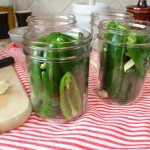
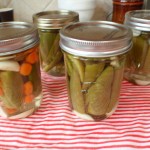
Fill the jars; cut garlic in slivers, put a few in the bottom of the jar, add your jalapeños and carrots if using. Pack as many as you can into the jar up to the fill line adding more garlic as you go.
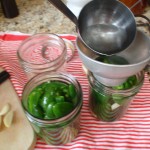
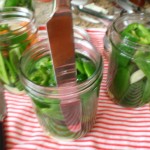
Use your canning funnel and ladle the hot vinegar mixture into the jars filling an inch from the top. Slip a butter knife around the inside of the jar; this will release air bubbles and push the peppers down. At this time you may need to add more peppers to fill the jar. Sometimes you need to add more vinegar or you may need to take a bit out. You want more peppers then liquid, but enough liquid to cover the peppers and fill to the fill line on the jar.
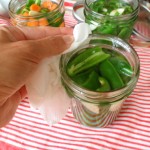
With a damp paper towel wipe the rims of the jars. This removes any food residue and will ensure a complete seal.
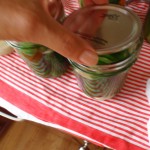
I then put the clean lids in the boiling water for a minute. This you will have to use regular tongs to retrieve from the water. Center the new lid on the jar; screw on bands and adjust until they are fingertip tight.
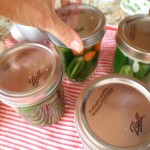
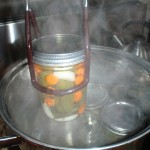
Place the jars into the pot of boiling water, the water should be 1-2 inches above the jars. Boil for 10 minutes. Remove and set onto a clean towel to cool. Allow jars to cool for 12 -24 hours before checking seals.
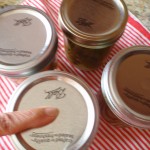
You will probably hear the lids popping from time to time as they cool. That is the sound of success! To check seals; press the center of lid. Lid should not flex up and down when pressed; if it does, it is not sealed and should be stored in the fridge for immediate use. Sealed jars can be stored for up to one year in a cool area.

